
Guide to Using the Bar30 with an Arduino
Introduction
Check out the video tutorial here!
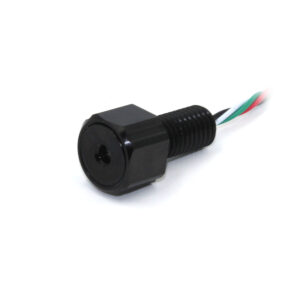
The Bar30 pressure sensor is a pressure sensor designed to be used underwater at pressures up to 30 bar, or around 300 meters depth in water. It communicates via I2C and comes with a 4-pin DF-13 connector that is compatible with the Pixhawk autopilot, the Level Converter and other microcontrollers.
Using a Bar30 with most Arduino (including the Uno, Mega, Micro and Nano) and other 5v microcontrollers requires an I2C logic level converter to communicate with a 3.3v device such as the Bar30. Note that some Arduino and other microcontrollers which run at 3.3v (including Raspberry Pis and the Pixhawk autopilot) do not require a logic level converter. Always make sure to check what voltage your microcontroller or computer uses before wiring up a sensor.
Note that the voltages being discussed here are the logic voltage levels, that is, what the I2C pins will be experiencing. This is typically the same voltage at which the device runs, but not necessarily the voltage of the input power supply. The Bar30 has a built-in 3.3v converter for power, so it can accept power anywhere from 3.3v to 5.5v. The Level Converter can also be used to supply 3.3v power from a 5v source: in this tutorial it is assumed that your Level Converter is set up to provide either 3.3v or 5v to the sensor. It is also assumed that both sets of header pins have been soldered to the Level Converter. See the Level Converter’s store page for details.
Most 3.3v devices do not tolerate higher voltages, so directly connecting the pins on an Arduino Uno to a such a device may fry your device. Some 3.3v devices are 5v-tolerant, meaning they will still function after being connected to 5v logic, but they will not necessarily be able to communicate with a microcontroller with 5v logic.
Parts and Tools
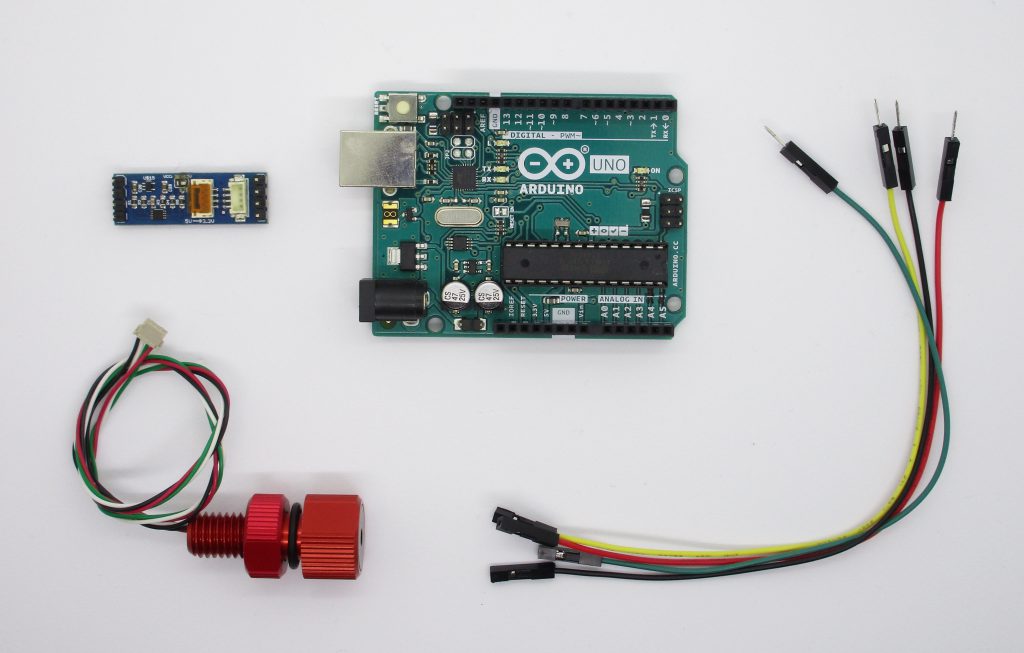
All of the components used in this guide.
You Will Need
You will also need:
- 1 x Arduino microcontroller (This tutorial uses an Arduino Uno)
- 4 x Breadboard Jumpers: M/F
- 1 x USB A to B cable (for connecting to your Arduino board)
Wire Connections
Connect the Bar30 to the Level Converter using the DF-13 connector.
If your Level Converter does not have the header pins soldered on as shown, you will need to solder them on yourself for the following step. Please see the Level Converter’s store page for details.
Connect the +5V, SDA, SCL, and GND pins on the Level Converter to the 5V, SDA, SCL, and GND pins on the Arduino using four jumper wires. Make sure you are connecting to the Level Converter pins on the far side from the DF-13 connector. See the table below for the pin assignments for SDA and SCL on a few common Arduino boards.
| Board | SDA | SCL |
|---|---|---|
| Arduino Uno | A4 | A5 |
| Arduino Mega | 20 | 19 |
Make sure the Level Converter’s +5V pin is connected to the Arduino’s 5V pin and not the 3.3V pin. Although the Bar30 is a 3.3 V device which can be powered at either 3.3 V or 5 V, the Level Converter is a 5 V device and as such requires a 5 V supply.
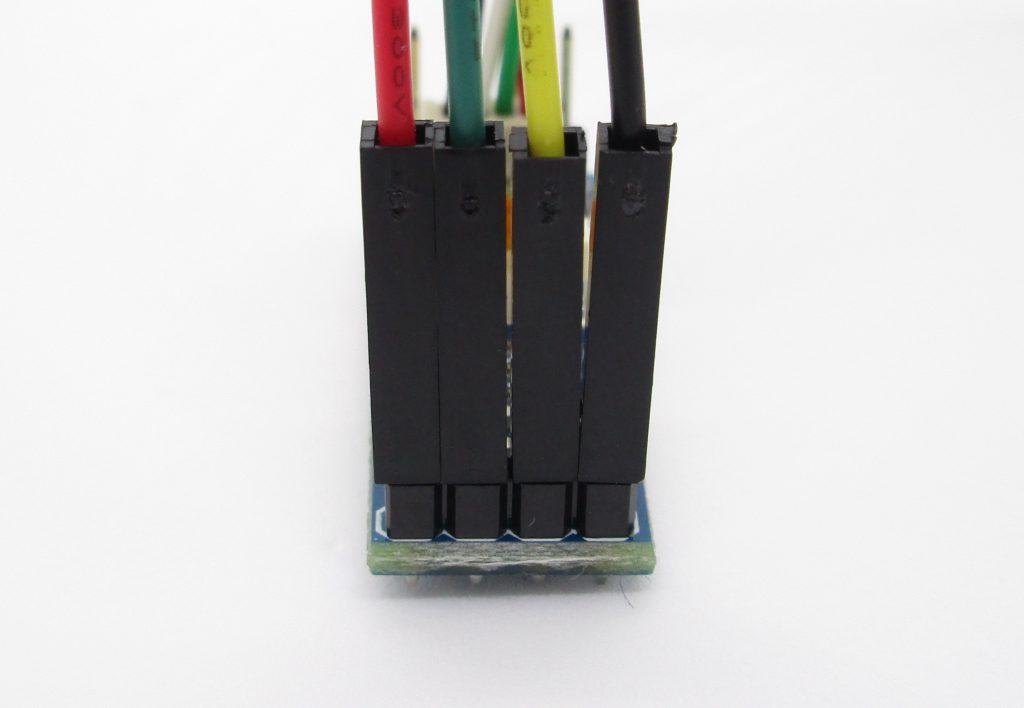
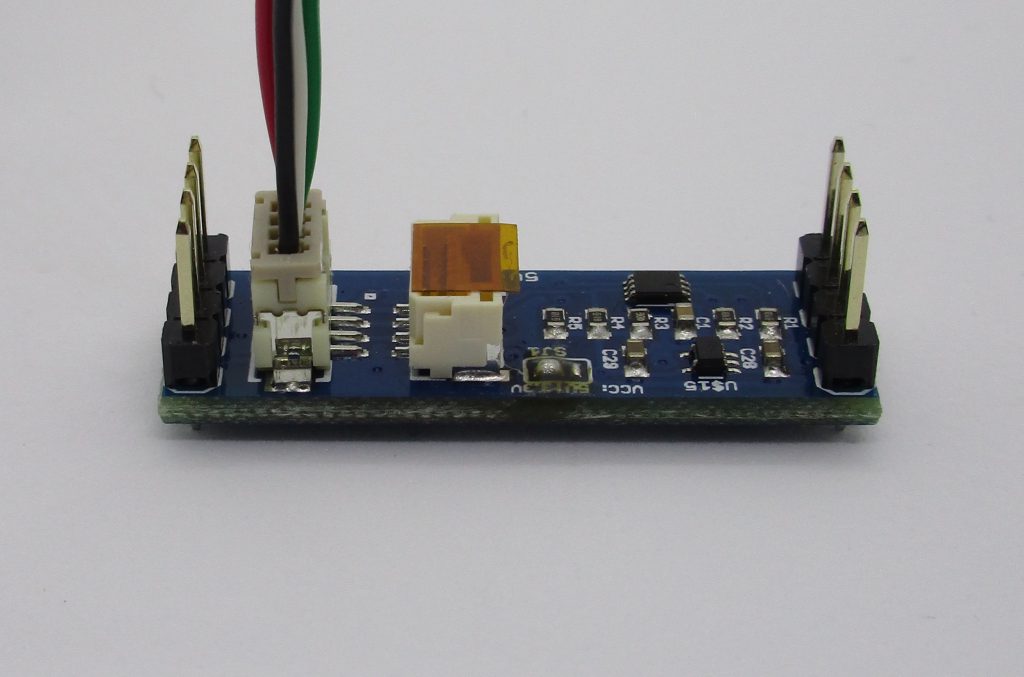
Jumper wire connections on the Level Converter board.
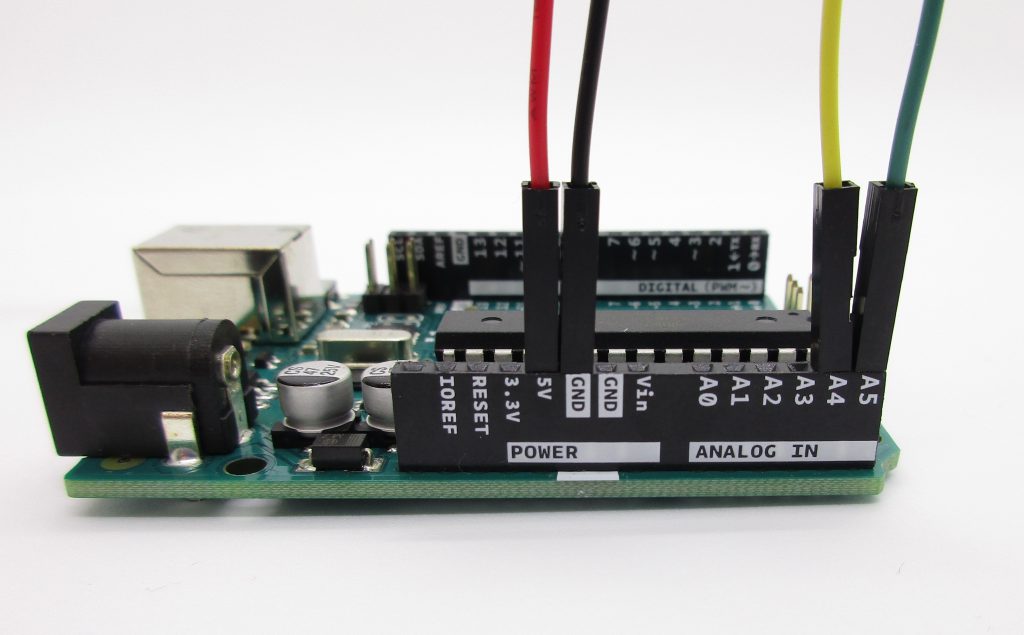
Jumper wire connections on the Arduino.
Arduino Library Installation
Download the BlueRobotics MS5837 Library
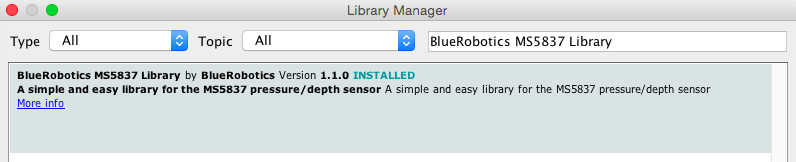
- via Library Manager (Sketch–>Include Library–>Manage Libraries):
- open the Library Manager and search for “BlueRobotics MS5837”
- click “Install”
- – download the library in zip format from: https://github.com/bluerobotics/BlueRobotics_MS5837_Library
- – unzip the library and place the folder in your Arduino/libraries folder
Uploading Example Sketch
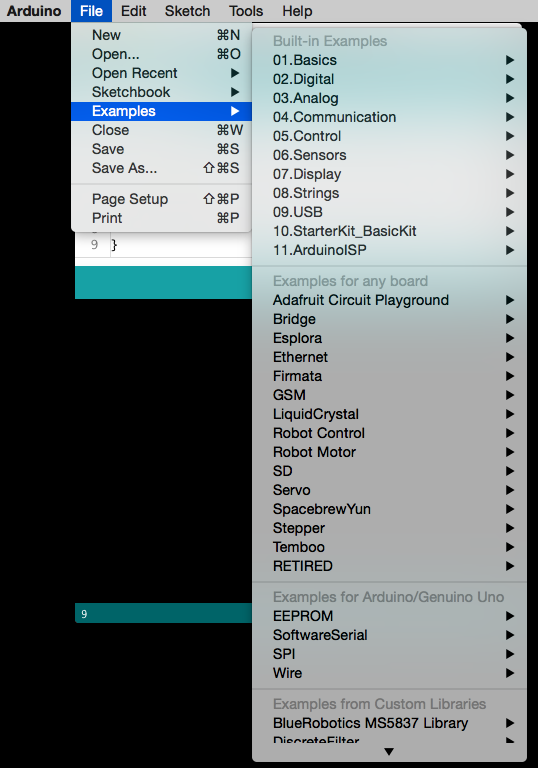
Open the example code. You may need to restart the Arduino IDE to see it.
Upload your code to the Arduino.
Open the Serial Monitor, making sure the Baud rate is set to 9600.
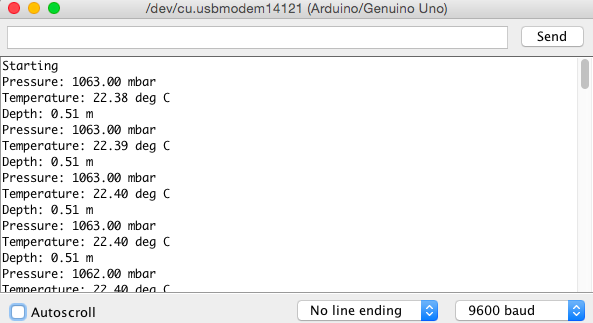
That’s it! You should see pressure, depth, and temperature data being printed to the Serial Monitor. If not, check the Troubleshooting section below.
Troubleshooting
I can’t communicate with my Bar30
- Make sure the Bar30 is receiving power. Check the Level Converter’s voltage selection jumper pads. Either 3.3 V or 5 V will work (5 V is recommended). See the Level Converter’s store page for details.
- Check your SCL and SDA connections. Try swapping the two jumpers: reversing them will not damage the sensor or microcontroller.
- Check your jumpers for continuity. Some cheap jumper cables have terrible electrical connections.
The values I’m seeing are way off
- Make sure you are using the correct model sensor in your code. Code interfacing with a Bar30 should contain the following line for sensor initialization:
sensor.setModel(MS5837::MS5837_30BA); - If your code sets the model as
MS5837::MS5837_02BA, the library will assume it is communicating with a Bar02 pressure sensor and will incorrectly interpret the incoming pressure data, resulting in absurd pressure and depth “measurements”.