
4″ Series Electronics Tray Assembly
By Rusty
Introduction
The Electronics Tray provides a convenient way to mount your electronics in a Watertight Enclosure for ROV/AUV (4″ Series). Compatible with the Camera Tilt System and used on the BlueROV2.
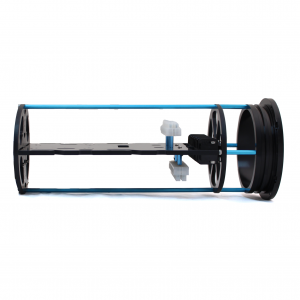
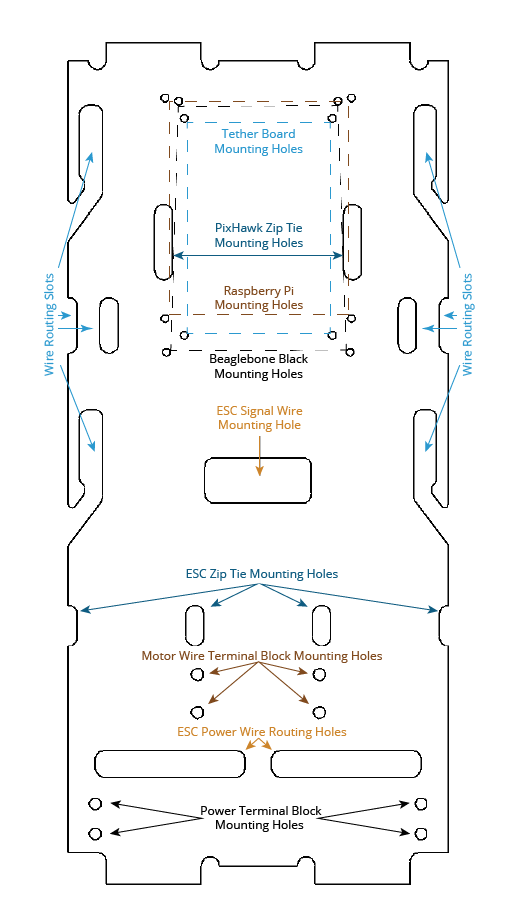
Diagram of the Tray
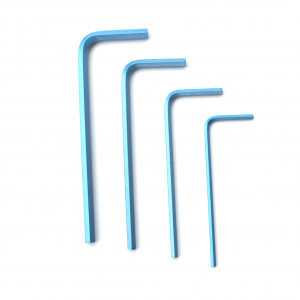
Parts and Tools
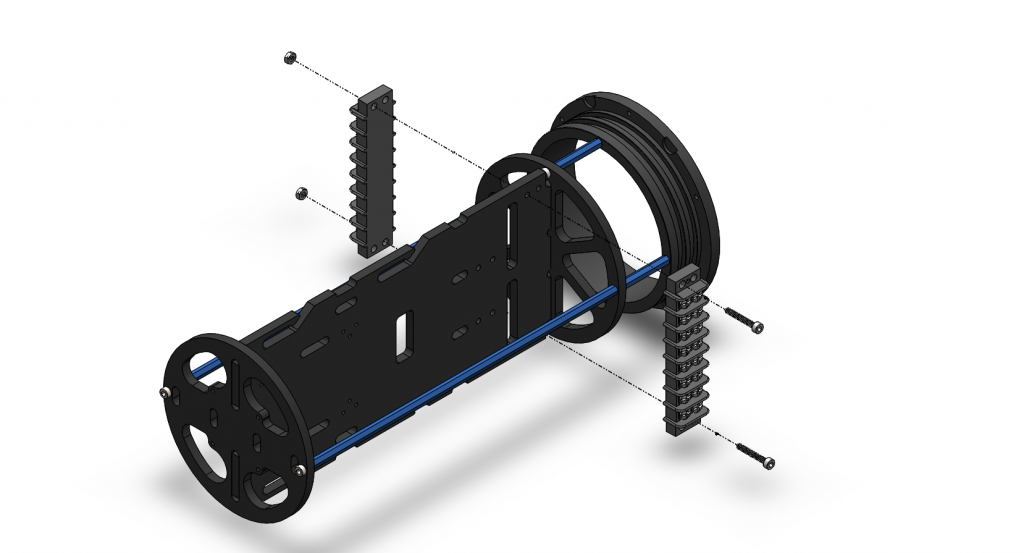
Assembling the Electronics Tray
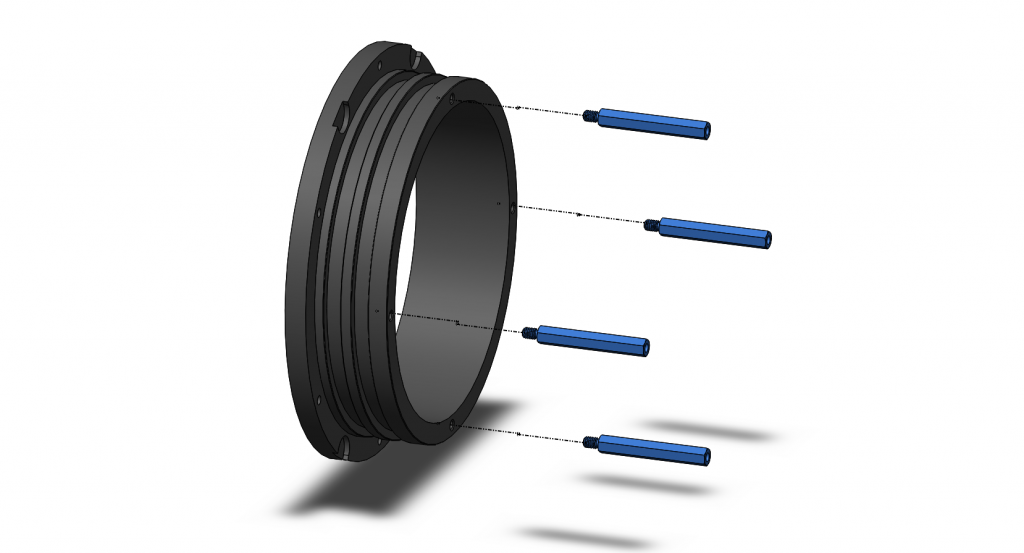
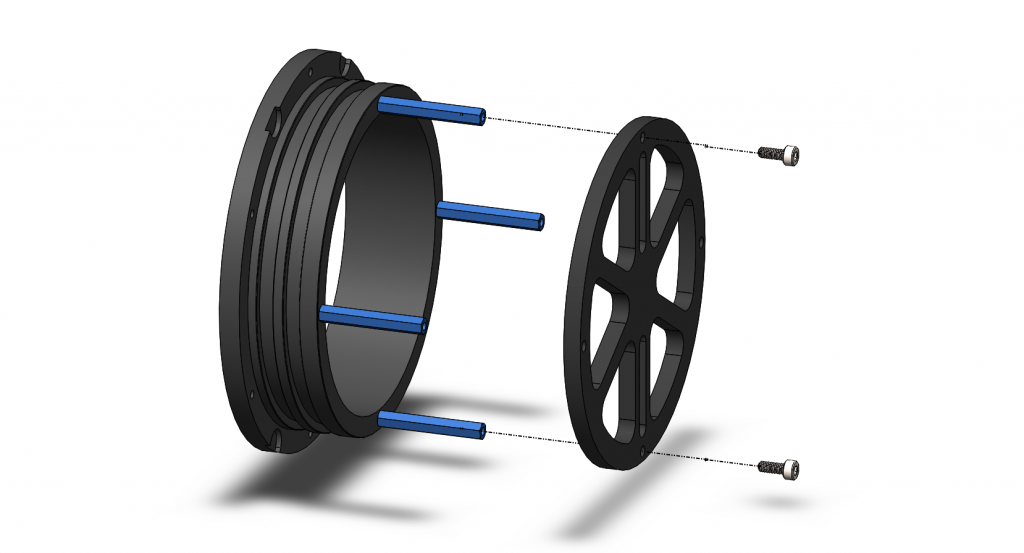
1. Install the four short standoffs in the four inch O-ring flange. Do not overtighten. Finger-tight plus 1/8th of a turn will secure these.
2. Install the rear panel on the short standoffs.
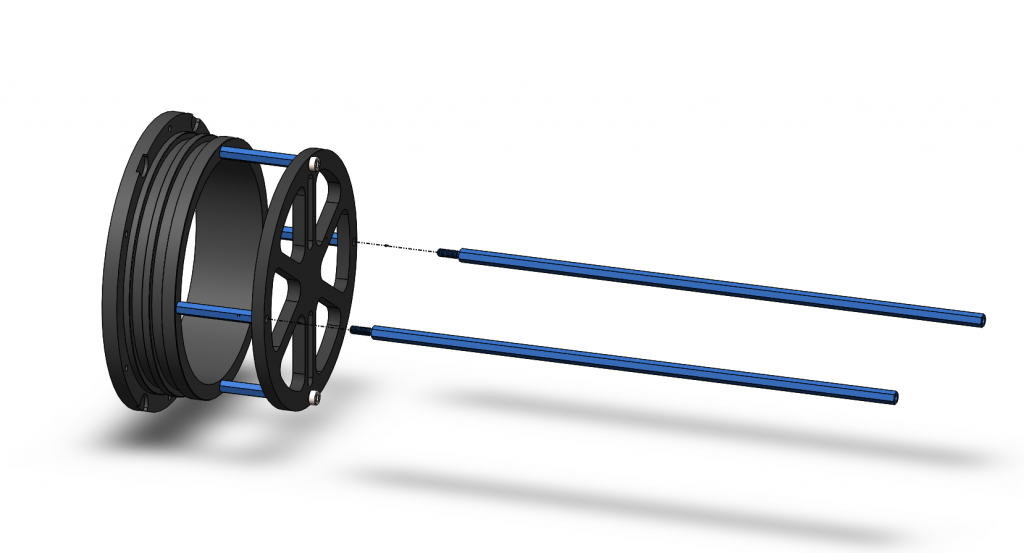
3. Install the long standoffs into the rear panel.
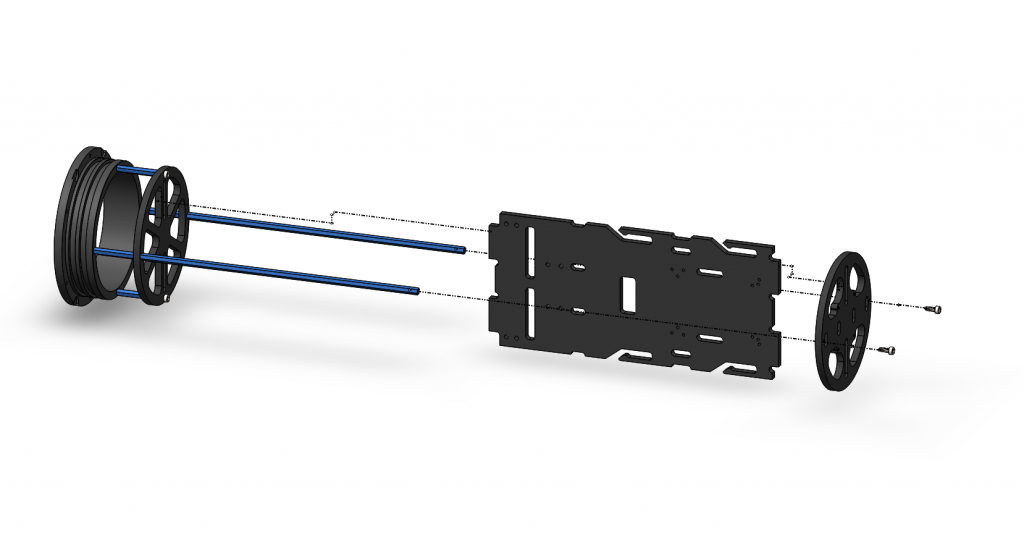
4. Install the main panel and front panel.
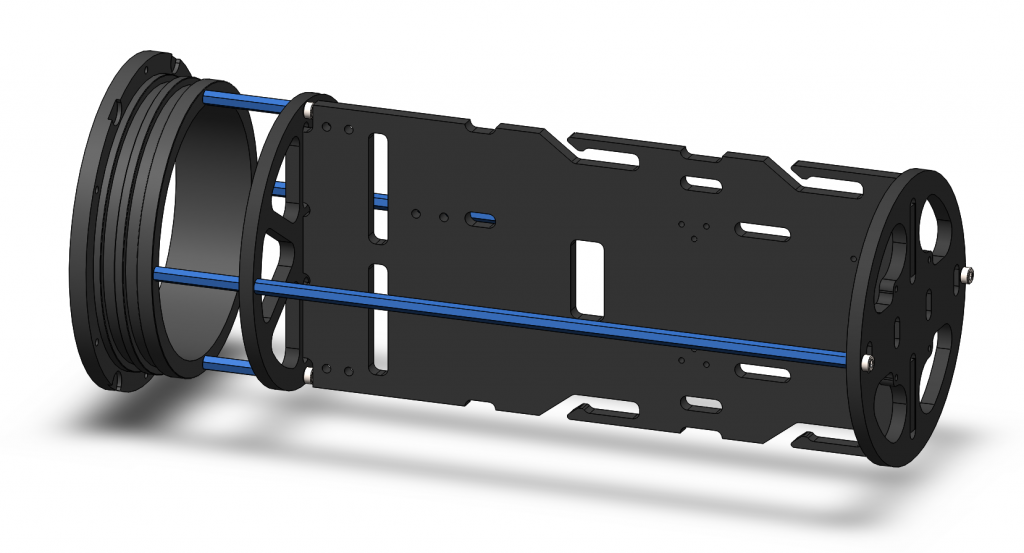
5. Now your Etray is ready for installing your electronics.
Installing the Terminal Blocks
The Electronics Tray optionally comes with 2 8-Circuit Barrier Blocks and 2 9-Circuit Eurostyle Terminal Strips, along with their mounting hardware. Below are instructions on how to attach them. Please note that if you are planning on installing Basic ESCs, it is easier to install them prior to installing the Barrier/Terminal Blocks. The rest of the electronics that the Electronics Tray is designed for can be mounted easily after the terminal blocks have been installed.
1. Attach the jumpers to the Black Screw Terminal Block if necessary for your application.
2. Install the 8-Circuit Barrier Blocks onto the main tray.
3. Install the standoffs and 9-Circuit Eurostyle Terminal Strip on top of the standoffs.
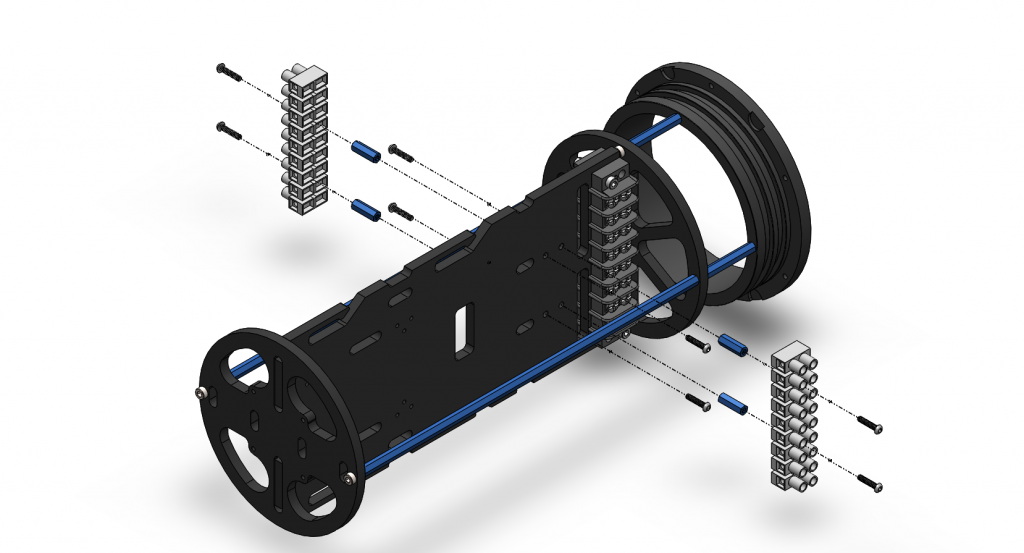
4. Now you are ready to finish installing your electronics!

Authors

Rusty
Rusty is the founder and CEO of Blue Robotics. His background is in engineering but he likes to be involved in everything at Blue Robotics!